Creating Batch Print Invoices Follow
While we recommend that invoicing be done in your accounting system by exporting invoices or billable time, if you are using SpringAhead as a solution independent of your accounting system, you can still create invoices in SpringAhead. Using this guide, you will:
- Mark data as exported
- Create Batch Print Invoices
Marking Data as Exported
- Log in as an administrator.
- Click on the Review tab.

- From the Review area, click on the Approved tab to view time that has been approved and is ready to be invoiced.
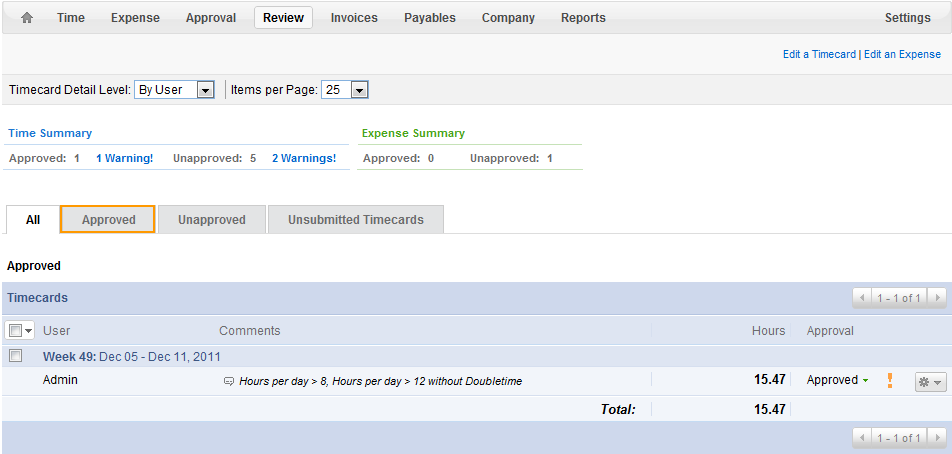
- Select the time you want to generate an invoice for by checking the box next to the timecard.

- Scroll to the bottom of the page and click Approve for Accounting.

- The timecard will now be advanced to the Invoicing tab.
- Click on Invoices on the Navigation bar.

- From this screen, select the information you would like to invoice.
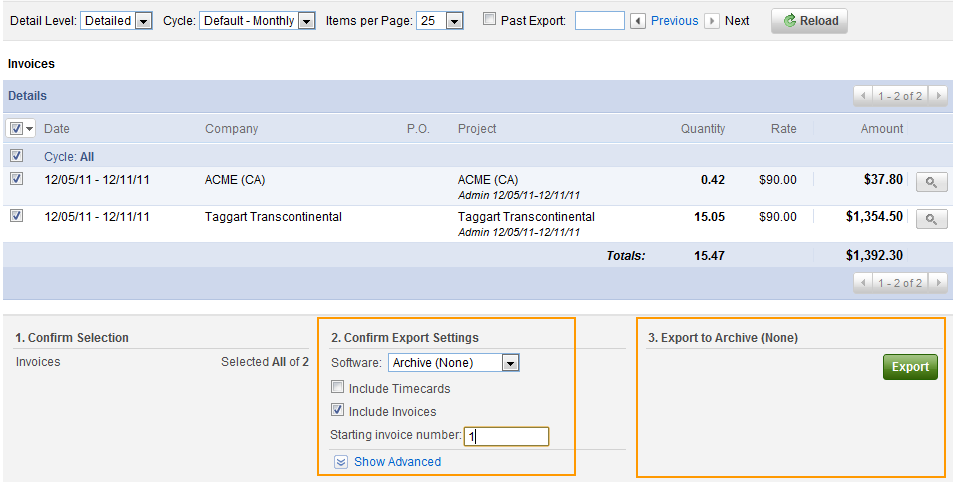
- In the Confirm Export Settings section, select “Archive (None)”, check Include Invoices, and set your starting invoice number.
- Click the Export button.
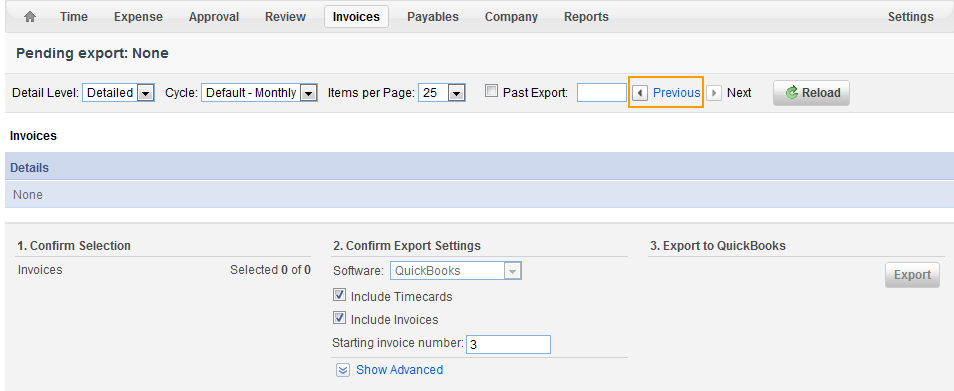
Your data has now been moved into an archived state, allowing invoices to be generated by SpringAhead. On the Invoices tab, there will be no more data to export.
Batch Printing Invoices
To create SpringAhead-generated invoices using the Batch Print feature:
- Click on Invoices, then click on the Previous link to bring up your archived invoices.
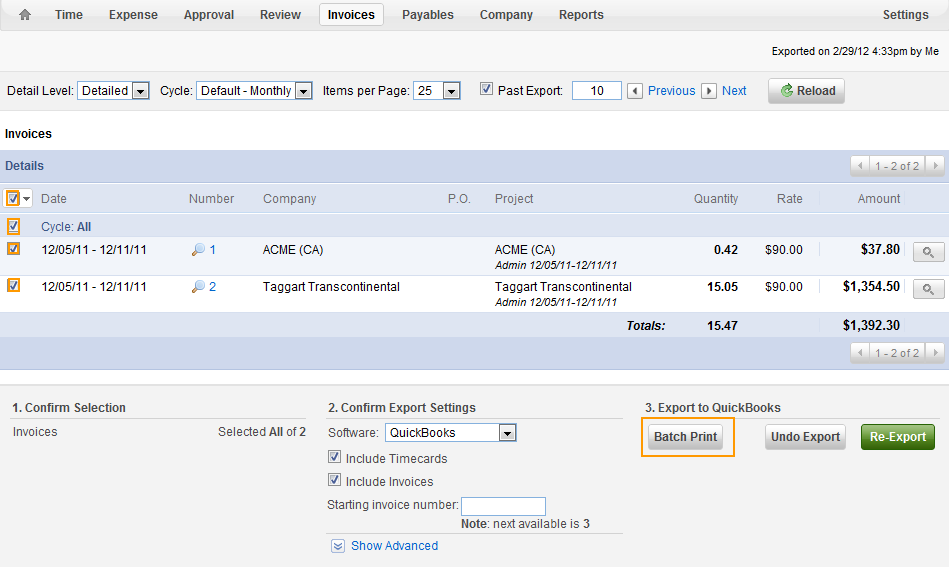
- Select your data and click the Batch Print button.
- Click Download to download the invoices as a PDF.
- Click Print to print the invoices.
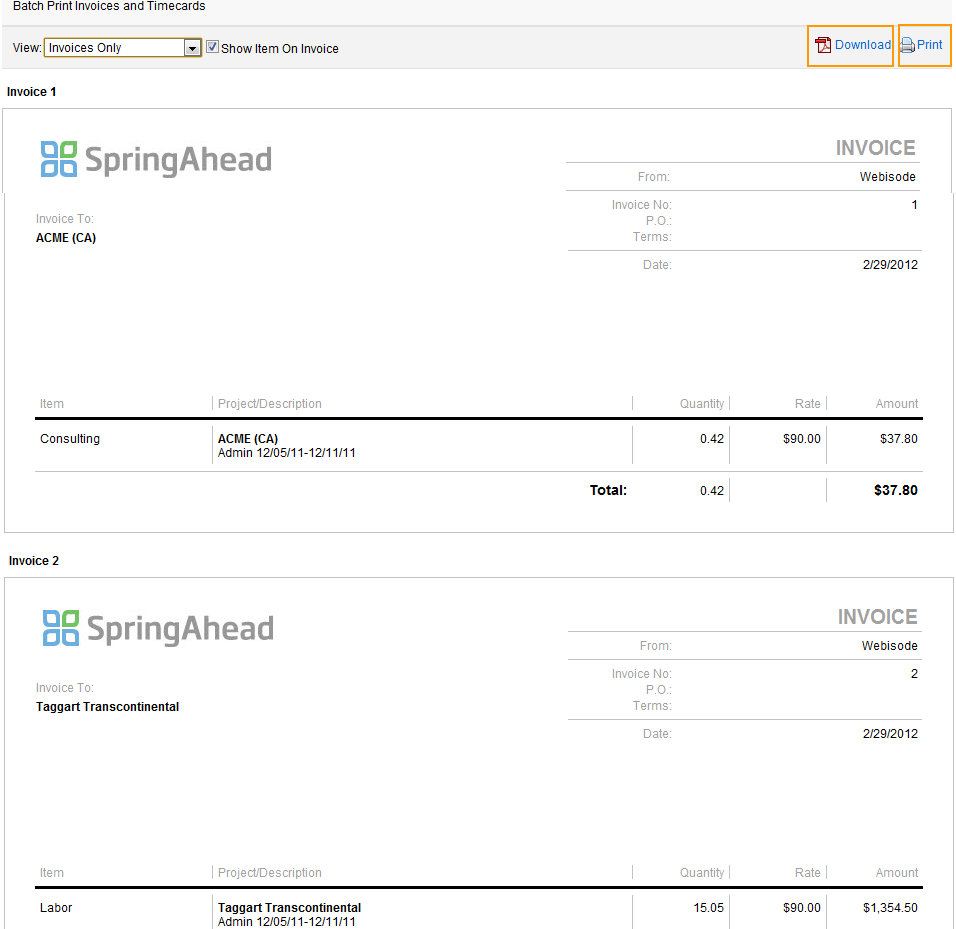
Please Note: If your account has been whitelabeled, in which your logo has replaced the SpringAhead logo, then your logo will appear in the upper left hand corner of the invoices. You also have the option to display the invoice item on the invoice. Invoices generated in SpringAhead cannot be further customized.