Items and Rates in SpringAhead Follow
QuickBooks describes Items as anything that your company buys, sells or resells. Therefore, items must be set up in QuickBooks in order to bill or pay. QuickBooks then attaches a rate to an item and then uses the combination of the rate and item for invoicing and payroll. SpringAhead offers item and rate management functions not available in QuickBooks:
- SpringAhead allows multiple rates to be attached to a single item
- SpringAhead uses a simple hierarchy to manage complex rate schemes
Using this guide, you will:
- Easily assign items using QuickStart
- Review the rate and item hierarchy
- Review in-depth item and rate assignment
QuickStart: Assigning Items
To get started quickly, determine if any of these common scenarios fit your needs. If so, skip to the indicated section:
- Does each of your time submitters have their own, unique service item or a specific service that they always perform? If so, skip to the “Person” section in Settings Items and Rates below.
- Do your time submitters perform different services depending on the client? If so, skip to the “People Assigned to Projects” section in Settings Items and Rates below.
Reviewing the Rate and item Hierarchy
QuickBooks only allows one rate per item (the rate is “married” to the item). SpringAhead divorces the rate from the item, thus allowing you to assign multiple rates to a single item. For example, a typical QuickBooks setup for “Consulting” when there are multiple users with different bill rates would look something like this:
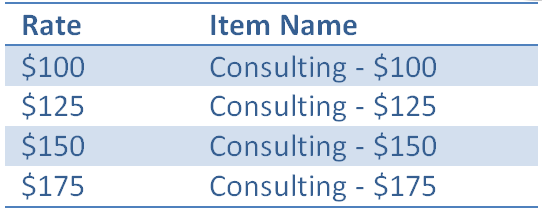
Note that there has to be a unique item name for each rate. Alternatively, SpringAhead allows you to assign multiple rates to a single item:

These rates and items are then automatically populated on your invoices in QuickBooks as if you had manually entered them.
How SpringAhead Handles Multiple Rates (Rate Hierarchy)
SpringAhead uses a hierarchy that allows your company to set rates and items in multiple locations (by project, by person, by task, etc.) and predictably manage which rate and item will be used in each circumstance. The hierarchy process is simple – SpringAhead looks in the following six places in the following order:
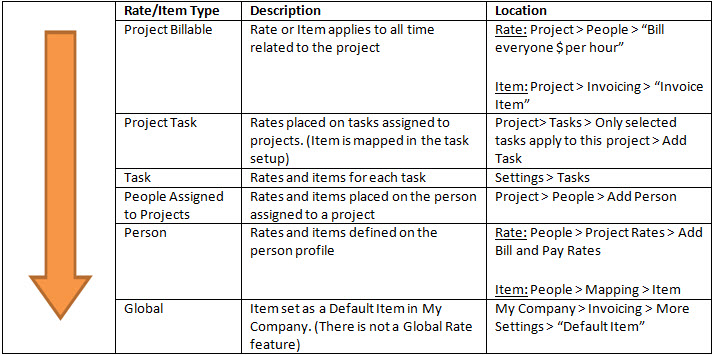
Once it finds a rate, it stops looking. Therefore, if different rates are populated in all six fields, the Project Bill rate will always be used. If only Task and Project People rates are entered, SpringAhead will always use the Task Rate because it is higher in the search order than Project People rates.
Simplifying Rate Setup
Here is an example of how you can use the hierarchy to simplify rate setup. Assume an employee, Karen, works at five companies and has the following bill rates for each:
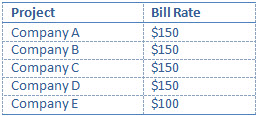
In this example, the easiest way to set up rates would be to set up a User Rate of $150 for Karen and a Project rate for Karen of $100 at Company E. Thus by entering two rates, the entire population of five companies is covered. Alternatively, individual rates could be entered at all five companies (more setup work, same result). SpringAhead will follow the same hierarchy when looking for a pay rate. The bill and pay rates may be set at entirely different levels. For example, SpringAhead can use the bill rate from the project level and the pay rate from the user level.
Setting In-Depth Items and Rates
The item and rate setup sections are presented in the reverse order of the rate hierarchy. This presentation parallels the easiest way to set up SpringAhead: Set up items and rates that cover most cases and then set up the exceptions. To add an item that doesn’t appear in a drop-down list, add the item in QuickBooks and use SpringConnect to bring the new item into SpringAhead. Note that only ‘Service’ type items are imported.
Global
To set a global item, follow these steps (a global rate cannot be set):
- Click My Company.
- Scroll down to Invoicing, and click More Settings.
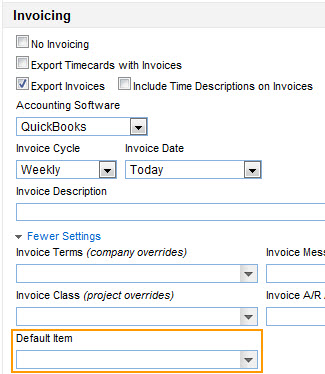
- Select the desired global item from the Default Item drop-down list.
- Click Save.
Person
To set an item at the person level:
- Click on People and click on the desired user.
- Within the project, click on the Mapping tab.
- Select the desired item from the Item drop-down list.

- Click Save and Exit.
Please Note: You may also map people to items on a larger scale using the Map User to Items Wizard.
To set rates at the person level:
- Click on People and click on the desired user.
- Click on the Project Rates tab and click Add Bill and Pay Rates.
- Enter the first date that the user can submit hours in the Start Date field.

- Enter the bill and/or pay rates.
- Click Save and Exit.
People Assigned to Projects
To set up an item and rates for people assigned to projects, follow these steps:
- Click Projects and select desired project.
- Within the project, click on the People tab.
- Click on Add Person, and enter the Users, Start and End Dates, Rates, and Invoice Items.
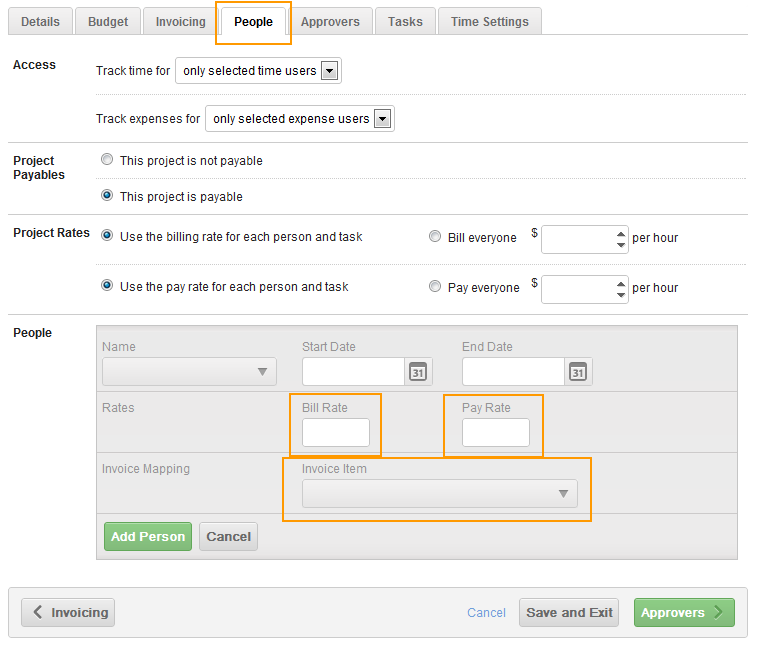
- Click the green Add Person.
- Click Save and Exit.
This item selection will override any items maintained at the global and user levels. It will not override the item set at the project invoices level (described below). Note: The End Date field is useful for rate changes. In combination with the start date field, you can define rates for periods of time. Leaving the end date field blank indicates to SpringAhead that the rate is to be used indefinitely.
Project Rate
If a single bill and/or pay rate applies to a project, it can be entered at the project level. This bill and/or pay rate will override all other rates, regardless of type. An invoicing item can also be set at the project level and it will also override all other item settings.
To enter a project invoicing item:
- Click Projects and select desired project.
- Within the project, click on the Invoicing tab.
- Select an Invoice Item.
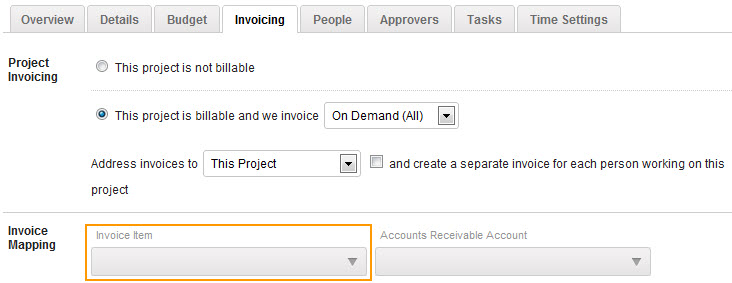
- Click Save and Exit.
To enter project rates:
- Click Projects and select desired project.
- Within the project, click on the People tab.
- In the Project Rates section, select Bill everyone $ per hour. Input the rate here.
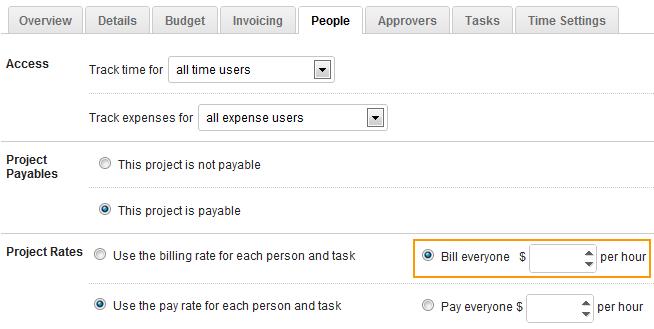
- Click Save and Exit.