Sendouts Integration Guide Follow
Creating a Placement for Export within Sendouts
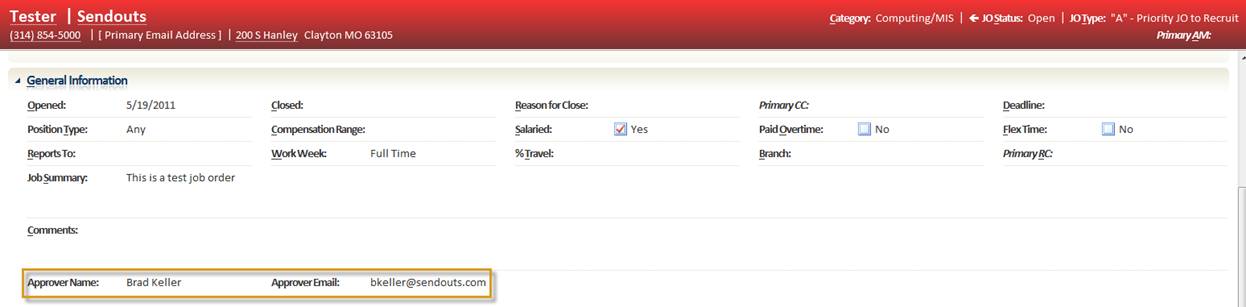
- Open a job within Sendouts
- Locate the General Information Section. Ensure that Approver Name and Approver Email are filled out appropriately
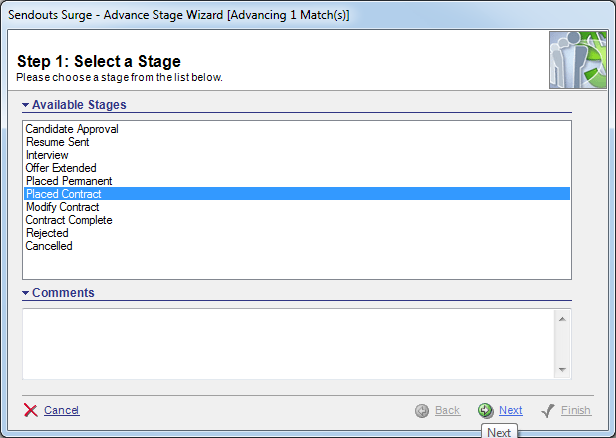
- When you have a placement, right click on the candidate and select Advance Stage

- Select the stage Placed Contract and click Next
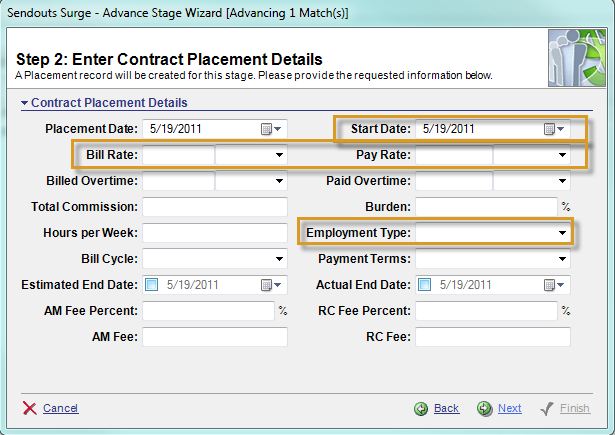
- On the Contract Placement Details page, enter the Start Date, Bill Rate and Pay Rate. When finished, click Next
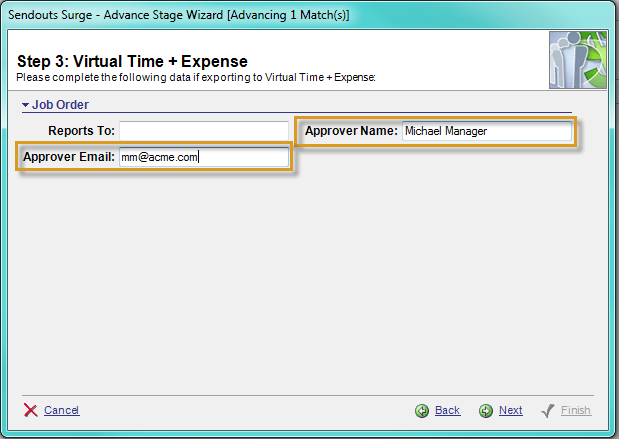
- On the SpringAhead page, it will display the Approver Name and Approver Email which should be pre-filled in for you. If you need to override this per placement, do so now
- On the Automated Stage Actions page, ensure that Export to SpringAhead is checked
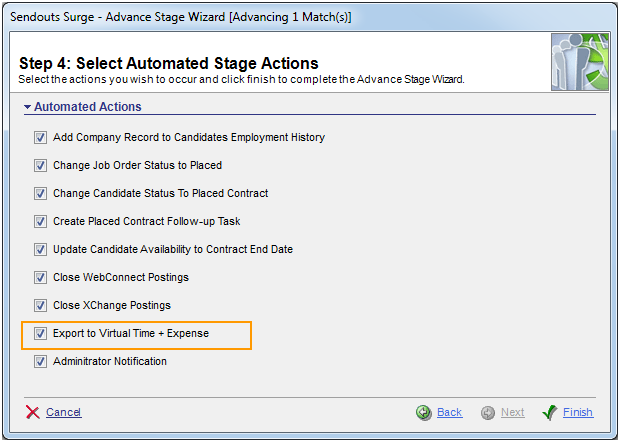
- When complete, Sendouts will send an email to the SpringAhead administrator
Exporting Placements to QuickBooks and SpringAhead
- Run SpringConnect
- Click Placements
- The options windows should open. Enter the login information and approver fields that were provided to you by Sendouts
- Click OK
- The list of unexported placements will now show

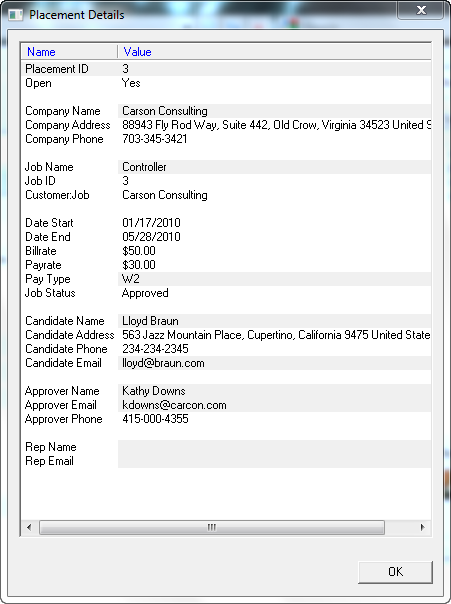
- If there is an error, that row will be in red. Right-click any placement to see the reason for the error or to view the data that will be exported to SpringAhead and QuickBooks
- Ensure that Export to QuickBooks and SpringAhead is checked, and that QuickBooks is open. Click Import.
Important Information Overview
- The information that goes into QuickBooks is the following:
- Customer and sub-job(s) as applicable
- Employee or Vendor (based on regular employee vs. contractor)
- The information that goes into SpringAhead is the following:
- User for Approver
- User for employee/contractor
- Project (approver is set on the project)
- The employee is placed in the User Rates section of the project with the correct Bill Rate and Pay Rate
- Both users get automatic login and passwords, set to first initial + last name (example: bpirtle). Email addresses will carry forward for both as well
Placement Login Instructions
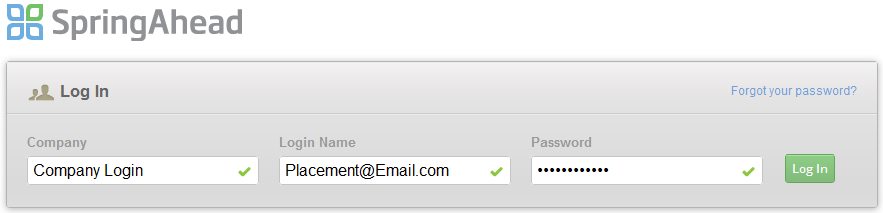
Your placements will automatically have their login name and password created for them:
Login name: Placements’ email (ex: Placement@Email.com)
Password: The text before the ‘@’ symbol (ex: Placement)
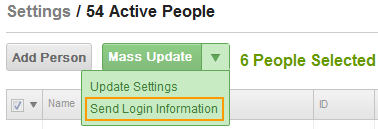
When you’re ready to let the people log into the system, simply send out welcome emails. You can do this as the administrator by logging into SpringAhead and going to your people list. Check off these new users and click on the arrow beside the Mass Update button, and select Send Login Information. This will send your users login information including their user name, password and a link to login.