Switching from Quickbooks Desktop to Quickbooks Online Follow
Switching from Quickbooks Desktop to Quickbooks Online
Switching from Quickbooks Desktop to Quickbooks Online is a simple process and can typically be handled within the same SpringAhead account. Below are the actions to prepare your SpringAhead account for this transition before connecting it with Quickbooks Online.
Please ensure you've read through the entire article before making changes.
Things To Know Before Switching From Quickbooks Desktop to Quickbooks Online
Before making the accounting system switch from Quickbooks Desktop to Quickbooks Online, there are a few key differences to note:
- Payroll items are not supported in Quickbooks Online. All time will be exported as Regular time.
- The text field in Quickbooks Online has a shorter character limit than Quickbooks Desktop.
- Quickbooks Online requires SpringConnect to be installed within the Admin’s computer’s Windows environment.
- If the switch is unsuccessful, and the data duplicates within the SpringAhead account, a new SpringAhead account may need to be created.
Preparing for the Switch
To prepare for the switch between Quickbooks Desktop and Quickbooks Online, we recommend going through Intuit’s transfer service to convert the Quickbooks Desktop file to Quickbooks Online.
More information on this service is available on the Intuit website via this article.
Once the Quickbooks Desktop data has been transferred to Quickbooks Online, the next step is to confirm the list data within Quickbooks Online matches exactly with the list data within SpringAhead. This is so SpringAhead’s name-matching logic will match and connect the data, and not create new entries.
Reset the list data and delete the XID's
An XID is a unique numerical code assigned to each piece of data synced from QuickBooks. This code allows the system to verify the existence of the data, which is essential for the validation process during export. Without the XID, the system cannot confirm whether the corresponding list data is present in QuickBooks.
To begin the transition from QuickBooks Desktop to QuickBooks Online, the first step is to reset the list element data. Resetting the data removes the XID from SpringAhead, which is used to link the data to its corresponding entry in QuickBooks.
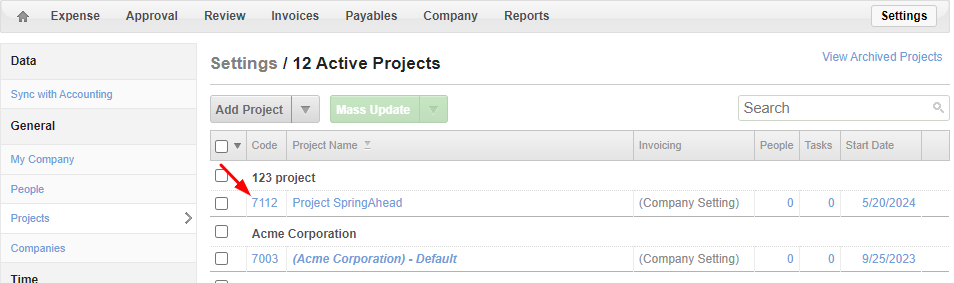
To reset the data, go to the list element you wish to remove, hover over the Code to reveal the red Trashcan icon, and click it:
Once deleted, navigate to Reset Data:
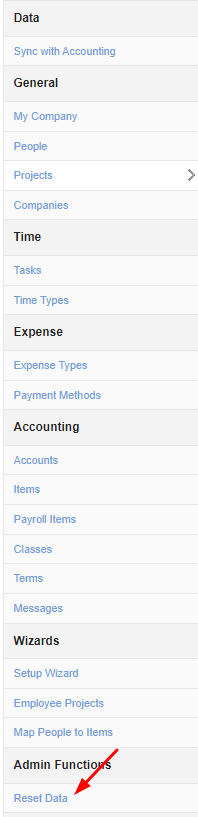
Select the List Data category from the drop-down:
Scroll to the List Data that you need to delete, and click the Reset External ID button:

Click Done to return to the SpringAhead Settings page:

Once all of the XIDs have been deleted and the data has been reset, you can proceed with the below steps.
Making the Switch
After you’ve confirmed the data matches between Quickbooks Online and SpringAhead, and that the data has been reset, you can proceed with connecting SpringAhead with Quickbooks Online. To do so, open up SpringConnect and navigate to Options > Settings:
And check the box which says QBOE, and click OK and return to SpringAhead:
Next, navigate to the Settings page in SpringAhead and switch the Accounting Software drop-down to Quickbooks Online. Click the Connect to Quickbooks Online button and follow the on-screen instructions to connect SpringAhead with Quickbooks Online.
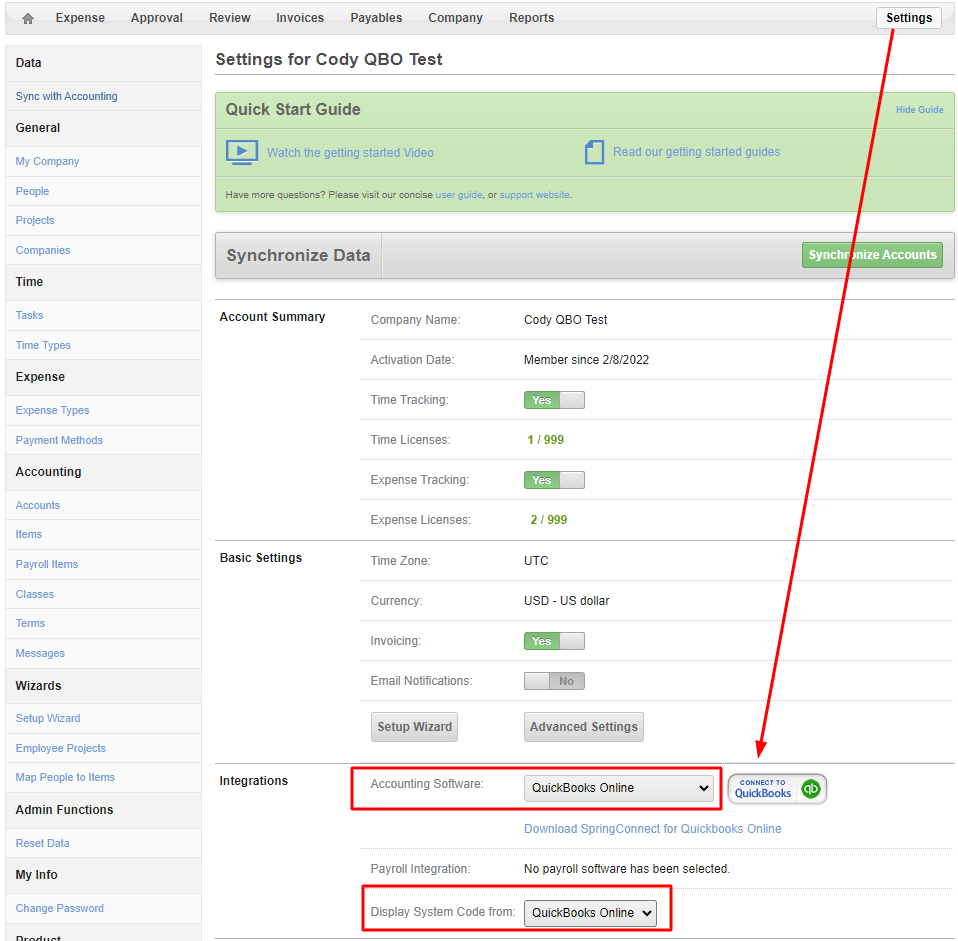
When you return to SpringAhead, select QuickBooks Online from the Display System Code from: the drop-down. This allows admins to see which data is connected to Quickbooks Online via the XID – a small line of code which connects the data between systems:
Running the Sync
After the systems have been connected you can now run the sync. To do so, open up SpringConnect and select one of the lists to sync. We recommend syncing each list one by one to confirm the list data is syncing properly.
Once the list is selected, click Synchronize:
What if I get duplicates?
Duplicates can occur if the system can’t name-match data during the sync. To resolve this, an admin has to confirm the information matches exactly between Quickbooks Online and SpringAhead. Once confirmed, the data will need to be reset and re-synced.
If you require help making the change or with this process, please create a ticket for our support team. Our team will assist you in scheduling an appointment with a dedicated member of our Professional Services team, who will be your primary point of contact throughout the setup process.